
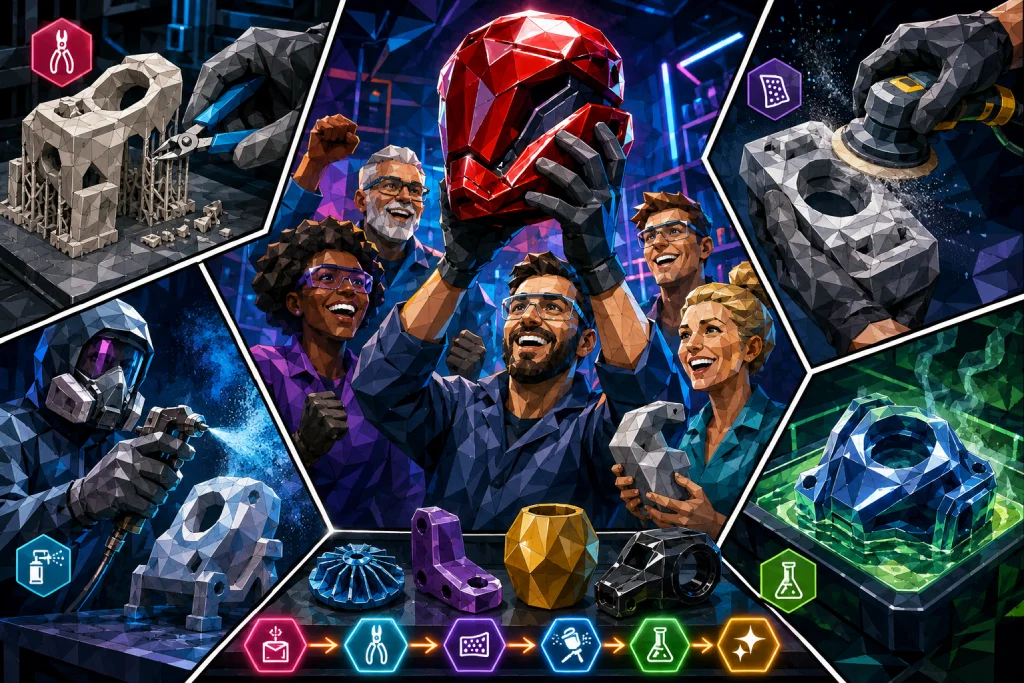
Understand the process that elevates technical prototypes to market-ready products through sanding, lacquering, and chemical welding.
Many customers mistakenly believe that a finished 3D print comes out of the machine with a mirror-like surface, ready for exhibition. The reality is different. Regardless of the technology, a 3D printer builds parts layer by layer, and this always leaves traces on the surface.
We manage your expectations and explain exactly what is required to go from a raw technical prototype to a high-gloss polished exhibition model. In this review, we describe the manual and chemical processes we use to ensure your part meets the requirements for both aesthetics and function.
When should you choose resin instead of FDM?
The choice of starting material dictates the amount of post-processing. You typically face two main paths, each of which places different demands on the subsequent work.
Resin (SLA/MSLA) 3D print delivers extremely high resolution. The layers are so fine they are often invisible to the naked eye, making the technology ideal for very small and detailed figures. It sounds like the easy solution, but resin has a weakness in the form of UV sensitivity. Without correct lacquering, sunlight will make the material brittle and discolored over time. Therefore, resin almost always requires a surface treatment if it is to be used in daylight.
FDM (filament) 3D print is the standard for strong, functional parts in plastic types such as PLA, PETG, and ABS. Here, you will always see the characteristic layer lines. In return, you get superior strength and durability. If you choose FDM for visual models, you should expect manual work with sanding and filling to hide the layers, but you end up with a more robust product.
What can you expect from a raw 3D print?
A raw 3D print has visible lines where the nozzle has deposited the plastic. The roughness of the surface depends on the layer height, which typically ranges between 0.1 mm and 0.3 mm, as well as the printing speed.
When we know that a part requires post-processing, we adjust the print settings in our slicer software before production even begins. We increase the number of walls (perimeters) and top layers. This ensures that we can sand the surface aggressively without risking sanding through to the internal structure (infill). A standard 3D print typically has only two walls, but for parts that require post-processing, we use at least four. This gives us the material depth needed to take action and refine the surface.
How do we remove support and structure?
No machine can print freely in thin air. Overhangs and complex shapes require support material, which we remove manually after the 3D print itself is finished.
We break off the coarse structure and then use precision snips for the residues located close to the part. Finally, we use a deburring tool with a rotating blade. This cuts a clean, smooth edge along the part where the support was attached. On technical materials like ABS, we also remove the “brim” or edge that holds the part to the build plate during printing. This manual work ensures that dimensional tolerances are precise and that no sharp plastic residues remain.
When are sanding and priming necessary?
If you want to remove the visible layer lines on an FDM 3D print, sanding is unavoidable. It is a time-consuming process that occurs in several stages to achieve a professional result.
We typically start with coarse 60 or 80 grit sandpaper to level out the peaks of the layers. Here, we often use electric sanding tools for large surfaces to ensure a uniform finish. Afterward, we gradually move up to 120 and 180 grit to remove the scratches from the initial coarse sanding.
For resin 3D print applications, we use wet sanding. We sand the part while it is wet or submerged in water. This binds the fine dust, avoiding the health risks associated with resin particles in the air. At the same time, the water prevents the sandpaper from clogging, which ensures a much finer and more uniform surface than dry sanding can provide.
How do we handle textured surfaces?
Sometimes, the surface is not meant to be smooth. If your 3D print needs to look like leather, cast iron, or fabric, standard sanding would ruin the desired effect.
In these cases, we repair any mold lines or errors by applying a technique where we dab filler on with a stiff brush. This recreates the texture over the repair so it blends seamlessly with the rest of the part. For deeper cracks or joints, we use two-component fillers like Apoxie Sculpt, which can be modeled to match the surrounding structure before it hardens. It requires craftsmanship to preserve the details while removing the flaws.
What is chemical smoothing and welding?
For materials like ABS and ASA, we offer a chemical shortcut that is particularly relevant for industrial customers. We use acetone vapors to melt the outer layer of the plastic in a controlled manner. This causes the layer lines to flow together, leaving a glossy, smooth, and sealed surface that is easy to keep clean. However, you should be aware that this process slightly rounds off sharp edges, so it is best suited for organic shapes.
We also use an ABS slurry—which is acetone dissolved with ABS plastic—to weld large parts together. If you have a design larger than the build volume of our 3D printer, we print it in sections. We assemble them chemically with this mixture so the joint becomes as strong as the material itself. This creates a part that looks and functions as one solid piece, rather than glued individual components that might break.
Can you paint and lacquer a 3D print?
A 3D print can be painted just like a traditional plastic part, but the preparation is crucial for durability. We use a spray filler, also known as filler primer, to fill in the final microscopic grooves that sanding did not remove.
The secret behind a professional finish is actually that we sand almost all the primer off again. The paint should only remain in the depressions between the layers to create a flat surface. We repeat this process of painting and sanding until the surface is completely even.
We always paint in a controlled environment with monitored temperature and humidity. If you paint in high humidity, the paint will not cure correctly, which ruins the finish. This is the difference between a hobbyist result and a professional delivery.
How do we install threads and assemblies?
3D printed plastic rarely holds up well to repeated screw mountings directly into the material, as the thread quickly wears down. Therefore, we post-install metal threads in the form of heat-set inserts.
We use heat to melt brass threaded bushings directly into the part. The plastic flows around the bushing’s ridges and hardens as it cools. This provides an extremely strong hold that can withstand being screwed on and off hundreds of times without losing its grip.
For assembling complex prototypes that do not need to be disassembled, we also use UV-curing resin as an adhesive. It cures instantly under UV light and can be sanded completely invisible, making the transition between two parts disappear entirely.
Which finish level should you choose for your project?
Use this overview to choose the right level for your order, balancing price in INR and aesthetics.
| Finish level | Description | Typical application |
| Raw (As Printed) | Support removed and edges deburred. Layer lines visible. | Functional brackets, internal components, early prototypes. |
| Standard Finish | Light surface sanding. Coarse mold lines removed. | Technical parts where function is prioritized over aesthetics. |
| Smooth & Primed | Full filling and sanding. Ready for painting. | Visual prototypes to be painted by the customer. |
| High Gloss / Showroom | Professional lacquering and polishing. No visible layers. | Exhibition models, final products, marketing material. |
FAQ: Post-processing of 3D print
Here you will find answers to the most common questions regarding the process from raw part to finished product. We cover everything from removing layer lines to material choice and durability.
Can you paint and lacquer a 3D print?
Yes, 3D print parts can be professionally painted if the preparation with sanding and priming is performed correctly. We apply spray filler to fill the layer lines, followed by several rounds of sanding and painting. To ensure a durable result, we always paint in an environment with controlled temperature so the paint cures perfectly.
How do you remove visible layer lines on a 3D print?
Layer lines are most effectively removed through a combination of coarse sanding, filler, and fine finishing. For FDM print, we start with 60-80 grit to level the surface, while for resin, we use wet sanding. For certain materials like ABS, we can also use chemical smoothing with acetone, which melts the surface smooth.
What is the difference in finish between FDM and resin print?
FDM print has distinct layer lines and requires significant sanding, while resin print is smoother but more UV-sensitive. Resin delivers extremely high resolution directly from your 3D printer but must be lacquered so as not to become brittle in sunlight. FDM is stronger but requires filler and elbow grease to achieve the same finish.
Can you use acetone to smooth all types of 3D print?
No, acetone only works for smoothing specific materials like ABS and ASA, not standard PLA. Acetone chemically melts the surface of ABS, creating a glossy finish. If you try this on PLA or PETG, it will simply discolor or ruin the part without effectively removing the layer lines.
Is 3D print strong enough for threads and screws?
Raw plastic threads wear out quickly, so we always recommend installing metal threads (heat-set inserts) for durability. We melt brass bushings into the part with heat so the plastic flows around them and hardens. This provides a professional metal thread that can withstand being screwed on and off many times in functional prototypes.
Can you repair the surface of a 3D print if it is uneven?
Yes, we can fix errors and even recreate textures using filler and modeling techniques. If the surface needs a structure like leather or cast iron, we dab filler on with a stiff brush. For deeper cracks, we use strong epoxy masses that bind the parts together and completely hide the transition.
Realize the full potential of your next project
Post-processing transforms a simple 3D print into a valuable final product that can be integrated directly into your value chain. Whether you need chemical welding of large ABS parts, installation of strong threads for functional use, or a perfectly lacquered surface for an exhibition stand, we have the processes and experience to deliver it.
Always remember to define the finish requirement when you send your inquiry. This saves time in the process and ensures that we choose the right production technology and post-processing from the start, so you receive exactly the product you expect.